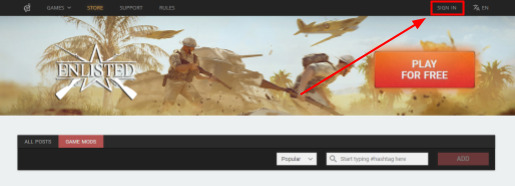
- To make the mod you’ve created available to the public, visit our Portal Sandbox
- Enter your account.

- Press ADD → Game mod.

-
In the new window you can change different settings of your mod.
-
Cover — add the main image that will be displayed on the mod hub page. It should be in JPEG format, 4:3 ratio and have resolution over 800x600.

Previews — you can add up to 8 additional images. They should be in JPEG format and have resolution of over 800x600.

- Upload game mod — upload the mod file that can be found in the game folder in

![]() “Let choose campaigns on match creation”: this checkbox must be checked at any circumstances, or else the mod wont work*
“Let choose campaigns on match creation”: this checkbox must be checked at any circumstances, or else the mod wont work*

- TITLE — text field containing the name of the mod.
- Settings that will be available for customization when creating a new game with a mod in Custom Battles:
- CAMPAIGN — Choose campaigns that can be used with the mod.
- Let choose campaigns on match creation — If checked, then the player can choose which campaigns from the selection to use for the battle. If unchecked, then all campaigns listed under CAMPAIGN will be available.
- TEAMS — Choose the type of teams — Historical or Fictional. If “Fictional” is chosen, then any nation from available campaigns will be usable as any team. “Any” means that the players will be able to choose this for themselves when setting up a battle.
- DIFFICULTY — Choose the difficulty level — Standard or Hardcore. “Any” means that the players will be able to choose this for themselves when setting up a battle.
- MODE — Choose the game mode — Squads or Lone Fighters.
- MAX PLAYERS — Maximum number of players that will be available in battle settings (20 for Squads, 50 for Lone Fighters).
- MAX AI-SOLDIERS — Maximum number of AI squads replacing players that will be available in battle settings (this value cannot be higher than MAX PLAYERS).
- POST — mod description.
Afterwards you can either save the mod as a draft, publish it, or cancel the changes and close the window.
- SAVE DRAFT — save the mod as a draft to get back to it after further editing. You can also edit the mod after publishing.
- PUBLISH — publish the mod. After pressing this button the mod will be available to everyone; all the players will see it on the site and will be able to create games using it.
- CANCEL — cancel the changes.
In order to go back to editing this mod, go to My profile.

Press the 3 dots in the upper right corner of your mod and then Edit post to go back to editing.

In a familiar window you can change options and press PUBLISH, if the mod hasn’t been published yet, or Save to save changes to the mod that has already been made public.
Launching the Mod (PC Only)
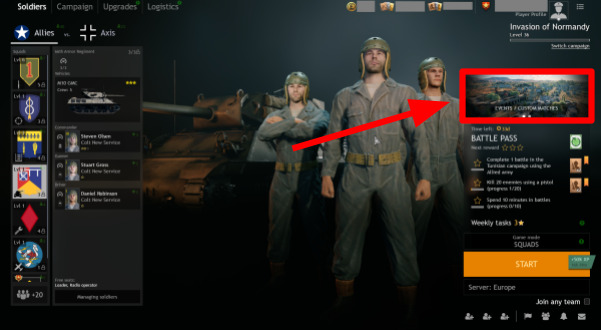
To launch the mod, you have to choose EVENTS / CUSTOM MATCHES.
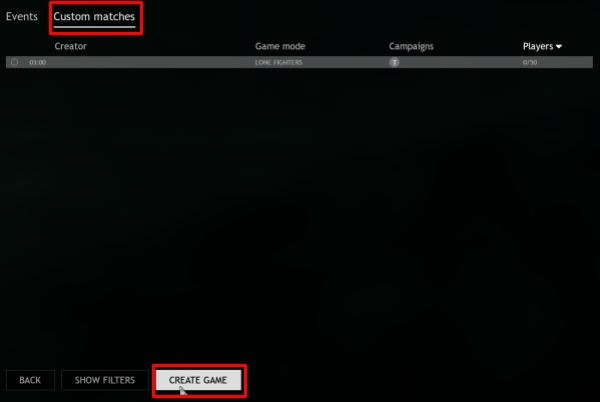
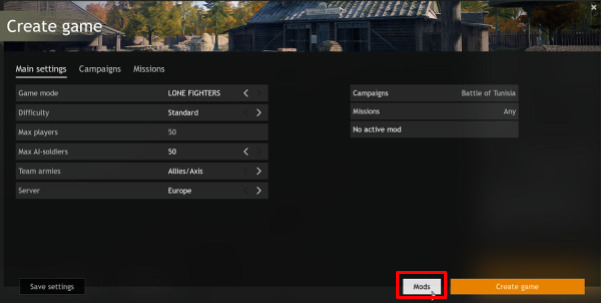
Go to the Custom matches tab and press Create Game.
Then pick Mods.
In the new window enter the link to the mod you want to launch in the Paste link text box. You can instantly open the mod list on the site by pressing Missions list on Enlisted portal.

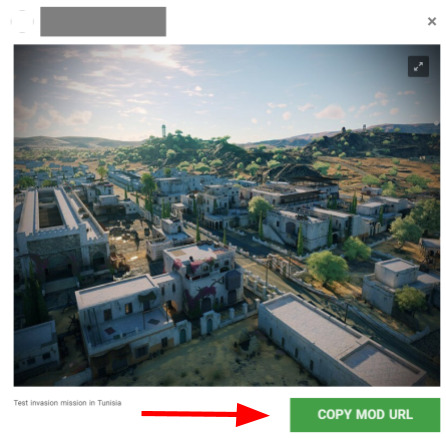
You can copy the link to the mod on the site: choose the mod you want and click COPY MOD URL.
After you’ve input the link into the Paste link field (you can do that with Ctrl+V), press Download mission.

Wait until the download finishes and press OK.

Then select the mod and click Apply.
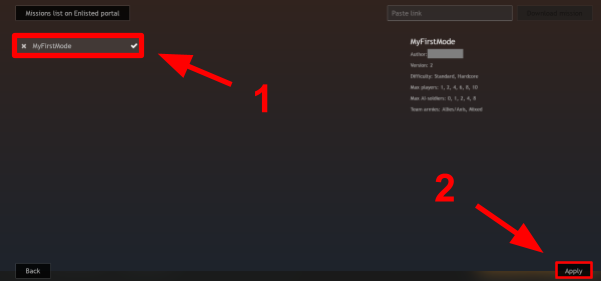
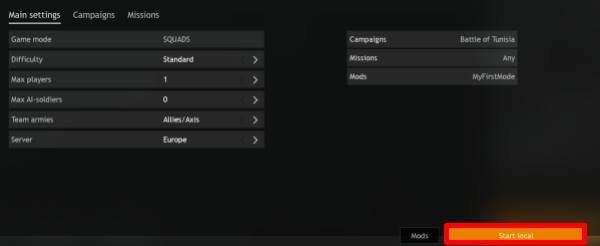
Then you can modify settings if needed, or just press Start.