Presented by: Enlisted Modders Community
1. Introduction
Currently in Enlisted modding, specifically in making custom maps, there are a bunch of different files that a mod can include:
-
scene.blk
Core file of a custom map, stores the information about the entities the modder placed in the scene with the Mods Editor.
Plain text file, must be placed at the root of mod folder and exactly named -
entities.blk
Optional file, allows a modder to define custom templates and modify existing ones. Highly important to create advanced maps.
Plain text file, must be placed at the root of mod folder and exactly named
Learn more: [Guide] Entity Modding (Entites.BLK) -
patch_nav_mesh.bin
Optional file generated by the Mods Editor that a level entity points to, patches the active navigation mesh to adapt to the placement of new rendinsts or terraform.
Binary file, technically can be placed anywhere within the mod folder, and named anything, as long as the import in level entity is modified -
level.blk and level.bin
Optional files, only for the most advanced modders. Learn more here:
Level.blk: [Guide] Level.BLK modding
Level.bin: uEnlistedCDK -
Loading screen files (.png, .jpg, .avif)
Optional files, imported by the briefing singleton entity. Mapped images will show up as the loading screen background. If more than 1 is set, randomly chooses one for the loading screen each time. Standard image files, can be placed anywhere in the mod folder
Among all of them, scene.blk and entities.blk is where you spend the most time in. As you develop your mod, those 2 files will get progressively more chaotic and messy. Even if you use comments and put your code in sections (in the case of entities.blk), it will still be difficult to read and debug at some point.
In this topic, I am going to introduce a simple yet effective way to de-clutter your project, and make the code base more readable and modular, and let redistribution become more simple.
2.1 Imports (scene.blk and entities.blk)
Just like in many programming language and scripting language, importing BLK files is possible in Enlisted custom mission projects. This means you can:
- Divide your codes into separate, individual files
- Create libraries
- Redistribute parts of your code to fellow modders with minimal effort.
- Develop and debug new features on separate files without affecting existing, working ones
- Isolate problematic parts of your code to make adjustments on them easily
The syntax for importing files are very different for scene.blk and entities.blk.
scene.blk
Scene importing in scene.blk is done with a “import block” (BLK stands for BLocK), shown in the following structure:
import{
  scene:t="%ugm/.../<filename>.blk"
}
The value of the string field scene is the absolute path to your target scene file to import, in which:
%ugm/points to the root of your mod folder, see below for details<filename>.blkis the file name of your target scene file. Replace “<filename” with the actual name of your file/.../represents any folders you have in between the target file and the root of the mod folder.
Example:
Der Riese scene import
The following example shows how scenes are managed in Der Riese.
A BLK is created to act as a centralized import table for other imported scene files.
// scene.blk
import{
  scene:t="%ugm/scene_items/_import.blk"
}
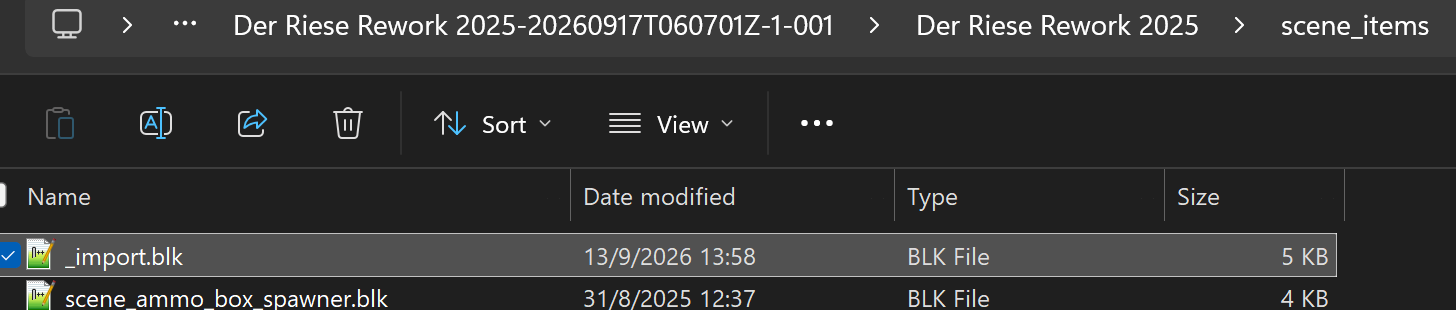
Then in _import.blk:
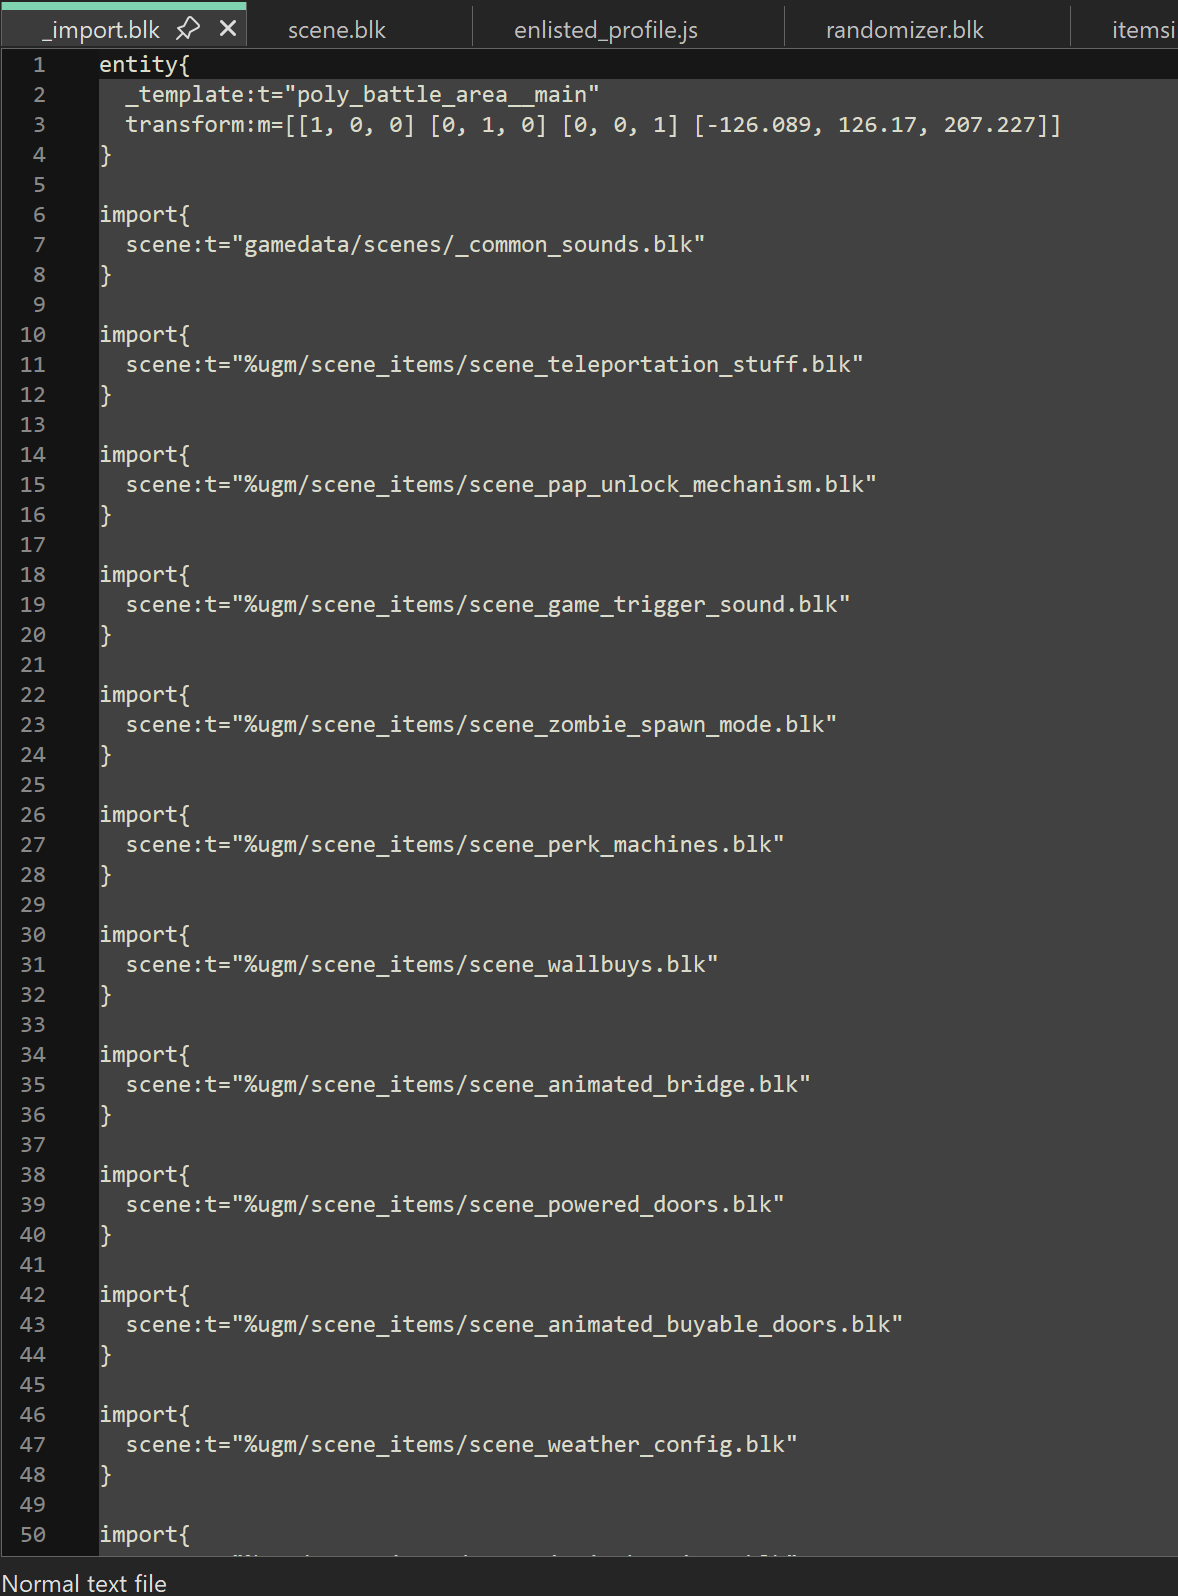
Everything there is imported to the map.
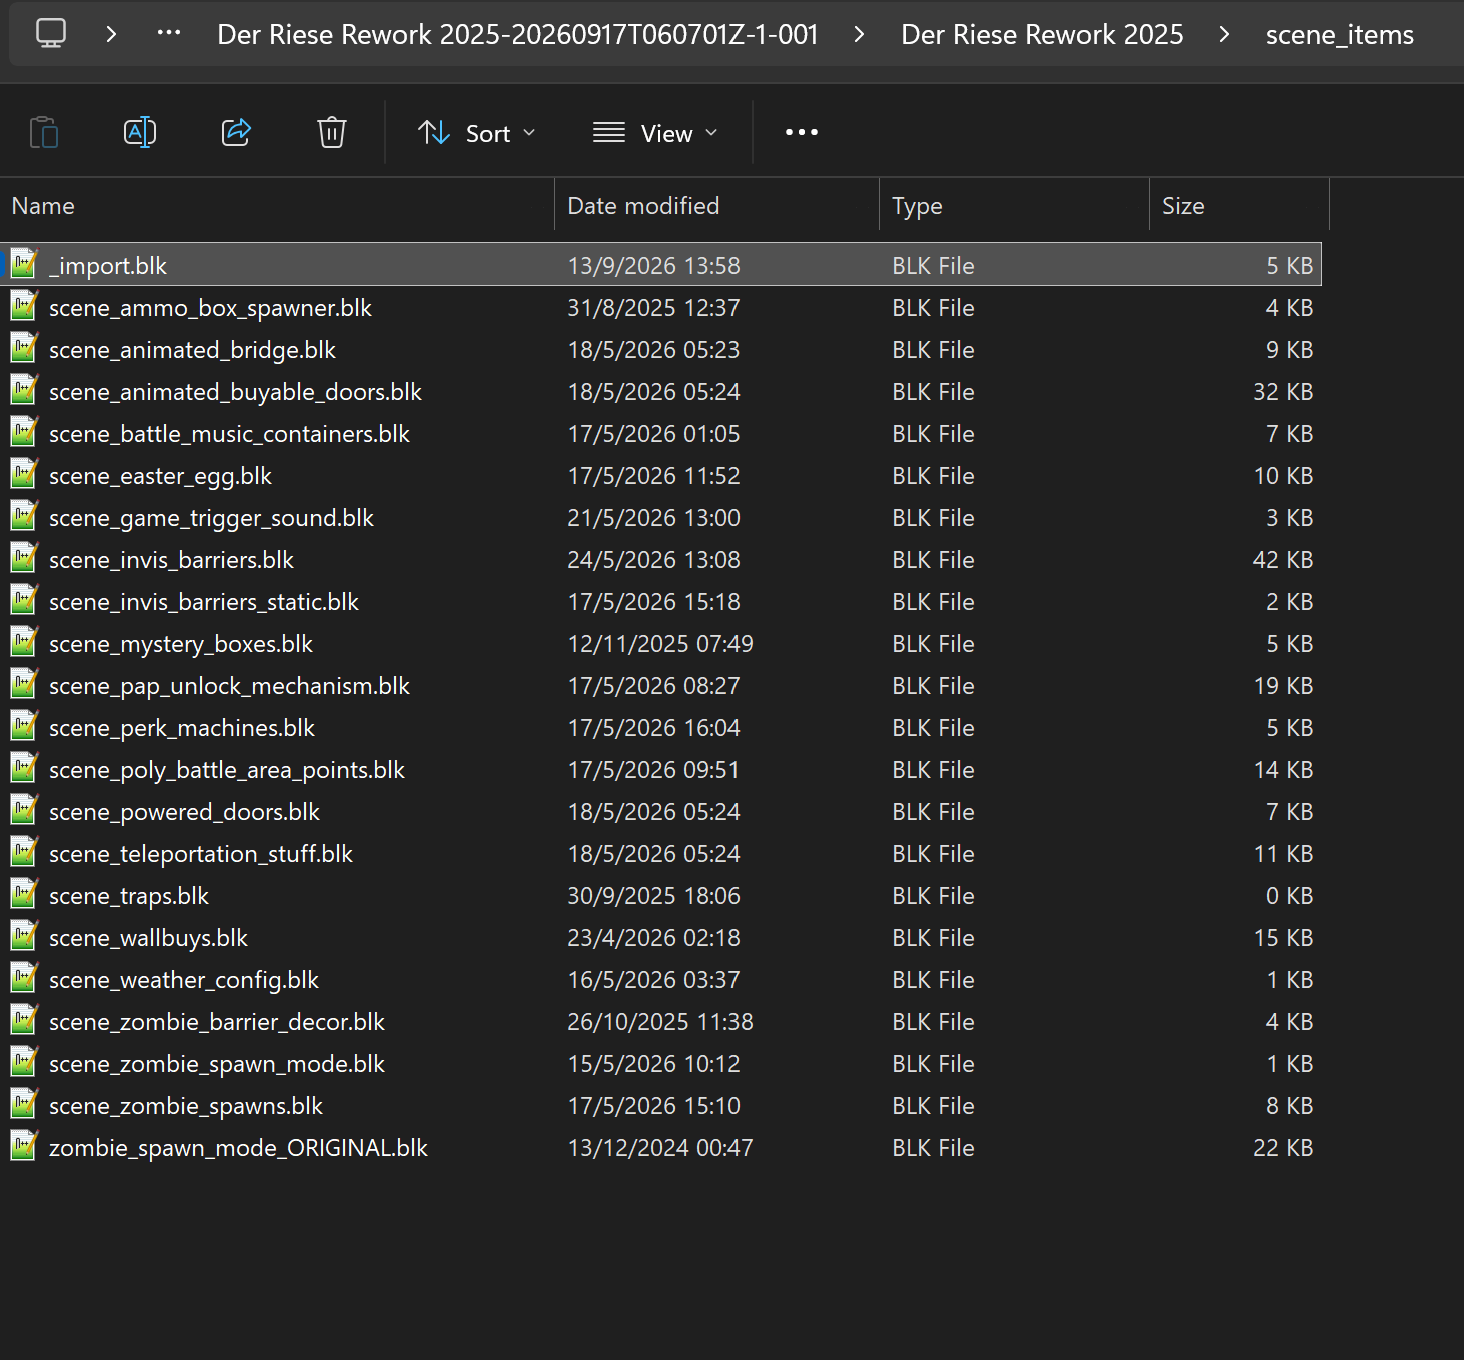
So when a new scene import is added, only _import.blk needs to be modified.
Note:
- Absolute path (
%ugmin the beginning) is necessary for importing scenes, relative paths does not work. - Imported scenes are managed separately in the Mods Editor
- Pressing Save in the Editor does not overwrite those imported files.
- A feature called the Scene Outliner is available in the Editor since 0.7.3.x, which helps manage imported scenes, more on that later
entities.blk
To import a file for entities.blk, there are 2 ways:
import:t="<filename>.blk"
import_optional:t="<filename>.blk"
importis the main way to import a file. Raises a fatal error when file is not found or contains syntax errors, and crashes the client.import_optionaldoes the same thing, except it silently fails when an error occurs- This means the game will not crash when it fails to load the target file, and continue loading other stuff
- This is useful when you are doing local development and do not want to accidentally include those code.
- Note that both absolute path and relative paths can be used in entities.blk importing.
- Relative path means that you omit
%ugmin the path - This way, the game will look for the target file starting from the current folder.
- Relative path means that you omit
Sample:
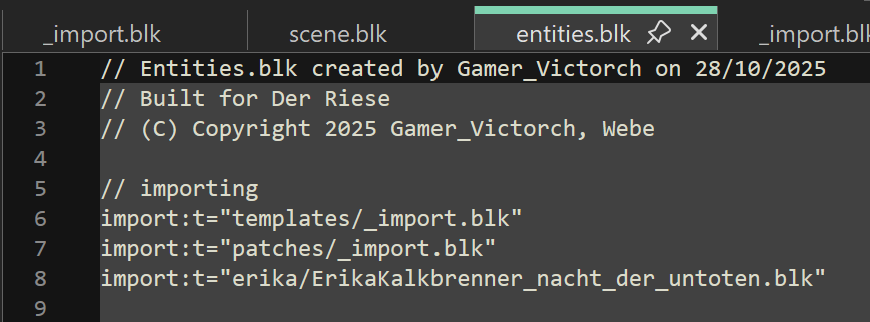
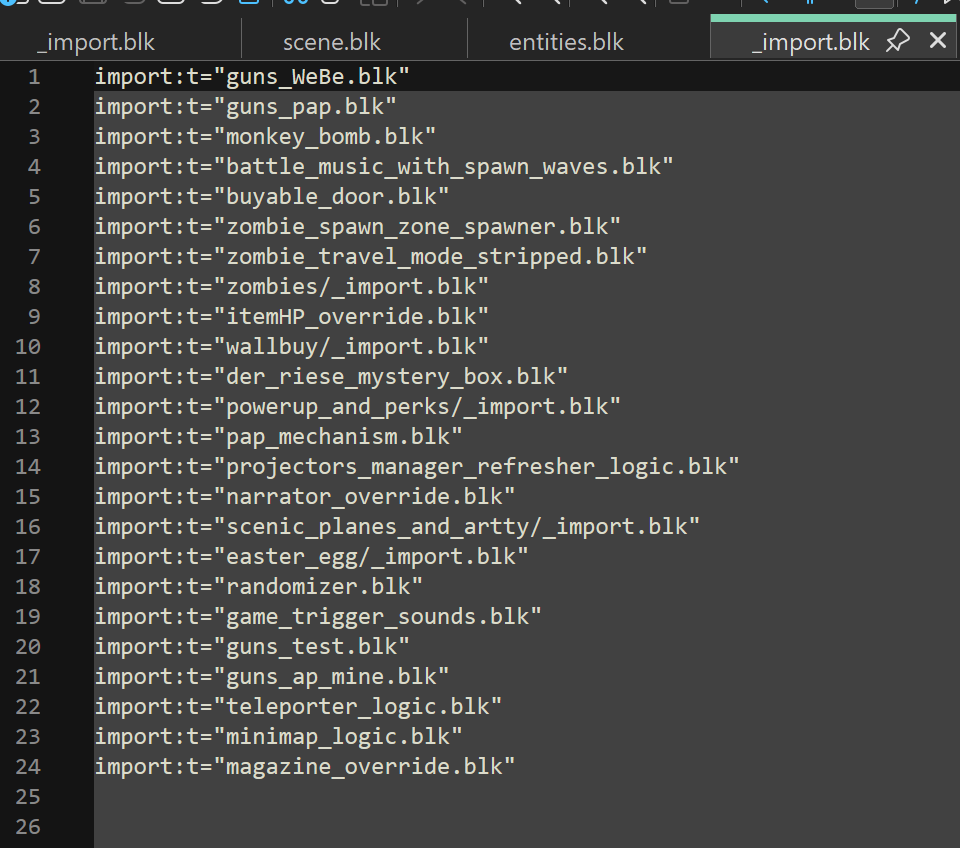
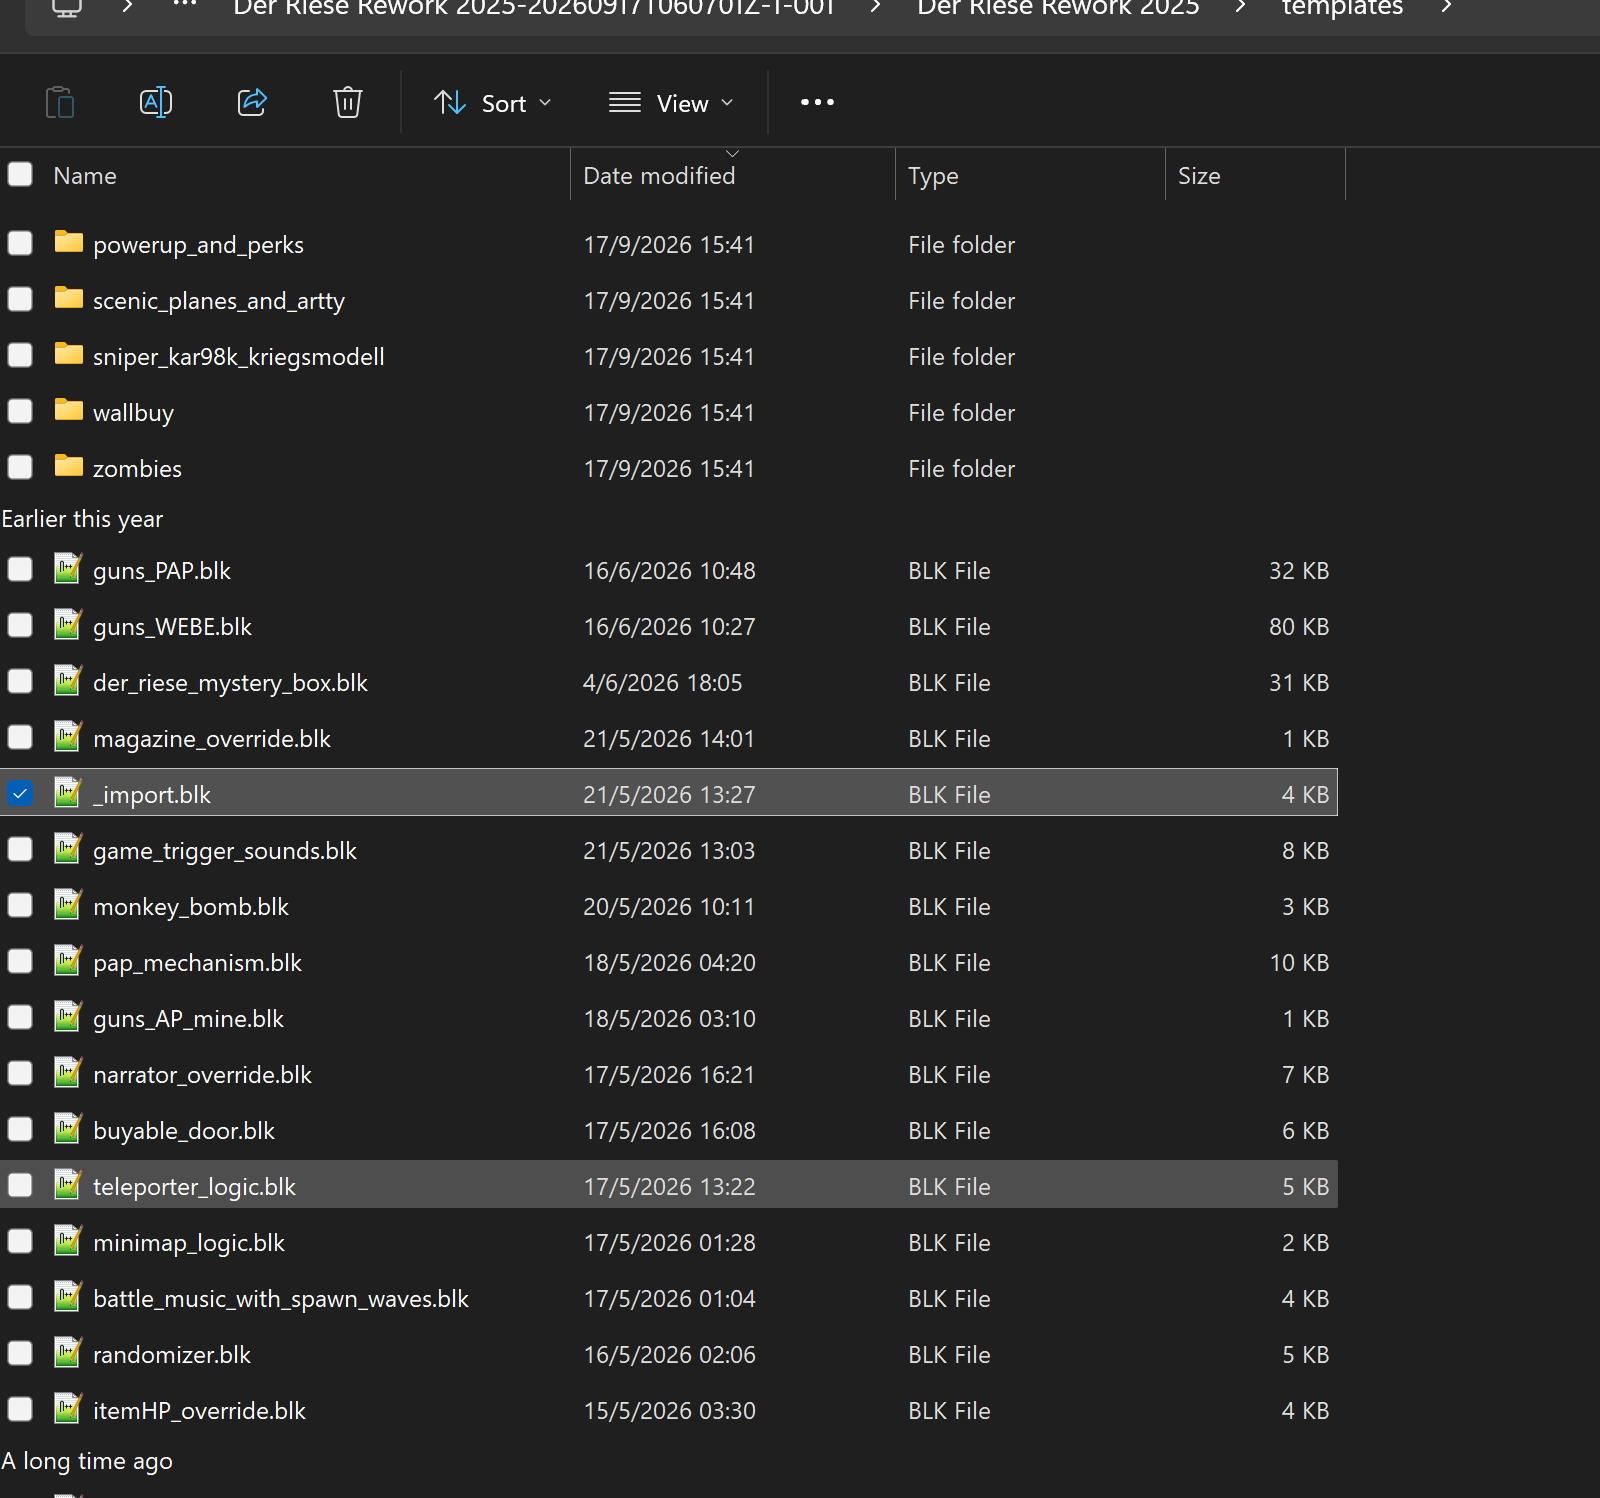
Important note:
-
The words
%ugmat the start of the path is a special keyword that tells the game to look for the mount point of the custom map.- This keyword allows the game to always able to locate the resource (file) you specify with the path relative to your mod’s folder.
- In short,
%ugm= the root path of your mod folder, where scene.blk and entities.blk is located
-
You must make sure that
importin entities.blk point to valid paths and that all of those files do not contain syntax errors- The Mods Editor WILL CRASH if
importpoints to non-existent files and/or files with syntax errors - The game will also crash if an importing loop is encountered (i.e. file A references file B and file B imports file A at the same time)
- Make sure none of these problems exist.
- The Mods Editor WILL CRASH if
-
The use of
import_optionalin entities.blk suppresses the crash when the file is not found or is invalid- However, since it fails silently, you might not notice something is not working, and may end up “chasing your own tail” finding the problem.
- Consider this before using
import_optional.
2.2 Wildcard Imports (entities.blk only)
Notice that it is a bit tiring to add the import lines to the import table file one by one each time you create a new file. There is a way to do it more efficiently.
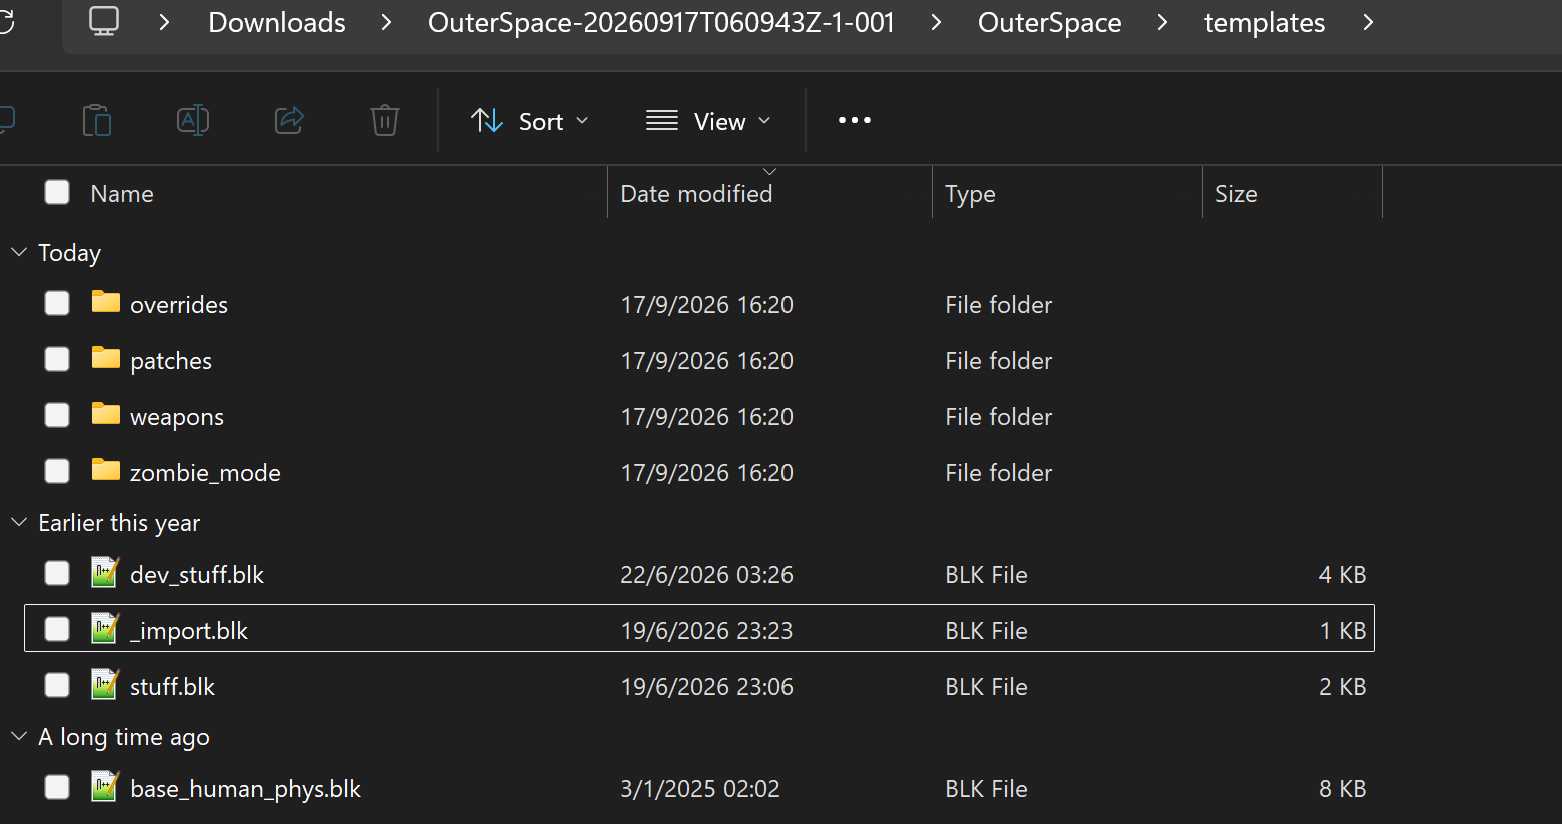
Introducing the wildcard expression:
// _import.blk
import:t="patches/*.blk"
import:t="overrides/*.blk"
import:t="zombie_mode/*.blk"
import:t="weapons/*.blk"
import:t="stuff.blk"
import:t="dev_stuff.blk"
Here, you can use the symbol * to include all files with the .blk extension.
With that, you can easily add new files without the worry of forgetting to import them
I will talk about the Scene Outliner later, it definitely deserves more recognition than it currently has